It’s hard to believe that 90 days have already passed since I started my project 365. One of the things I don’t have in my kit bag as a photographer is the knowledge and experience with working with artificial lighting.
Wanting to create a soft box so that I can sell some items on ebay, and perhaps even create some stock images I figured it was time to dust off some things I purchased last year. Wanting to go the less expensive route, I purchased from Home Depot some metal clamp light cones and 5500 Kelvin CFL Daylight light bulbs. I also purchased an inexpensive Table Top Studio light box.
Here are my first two attempts:
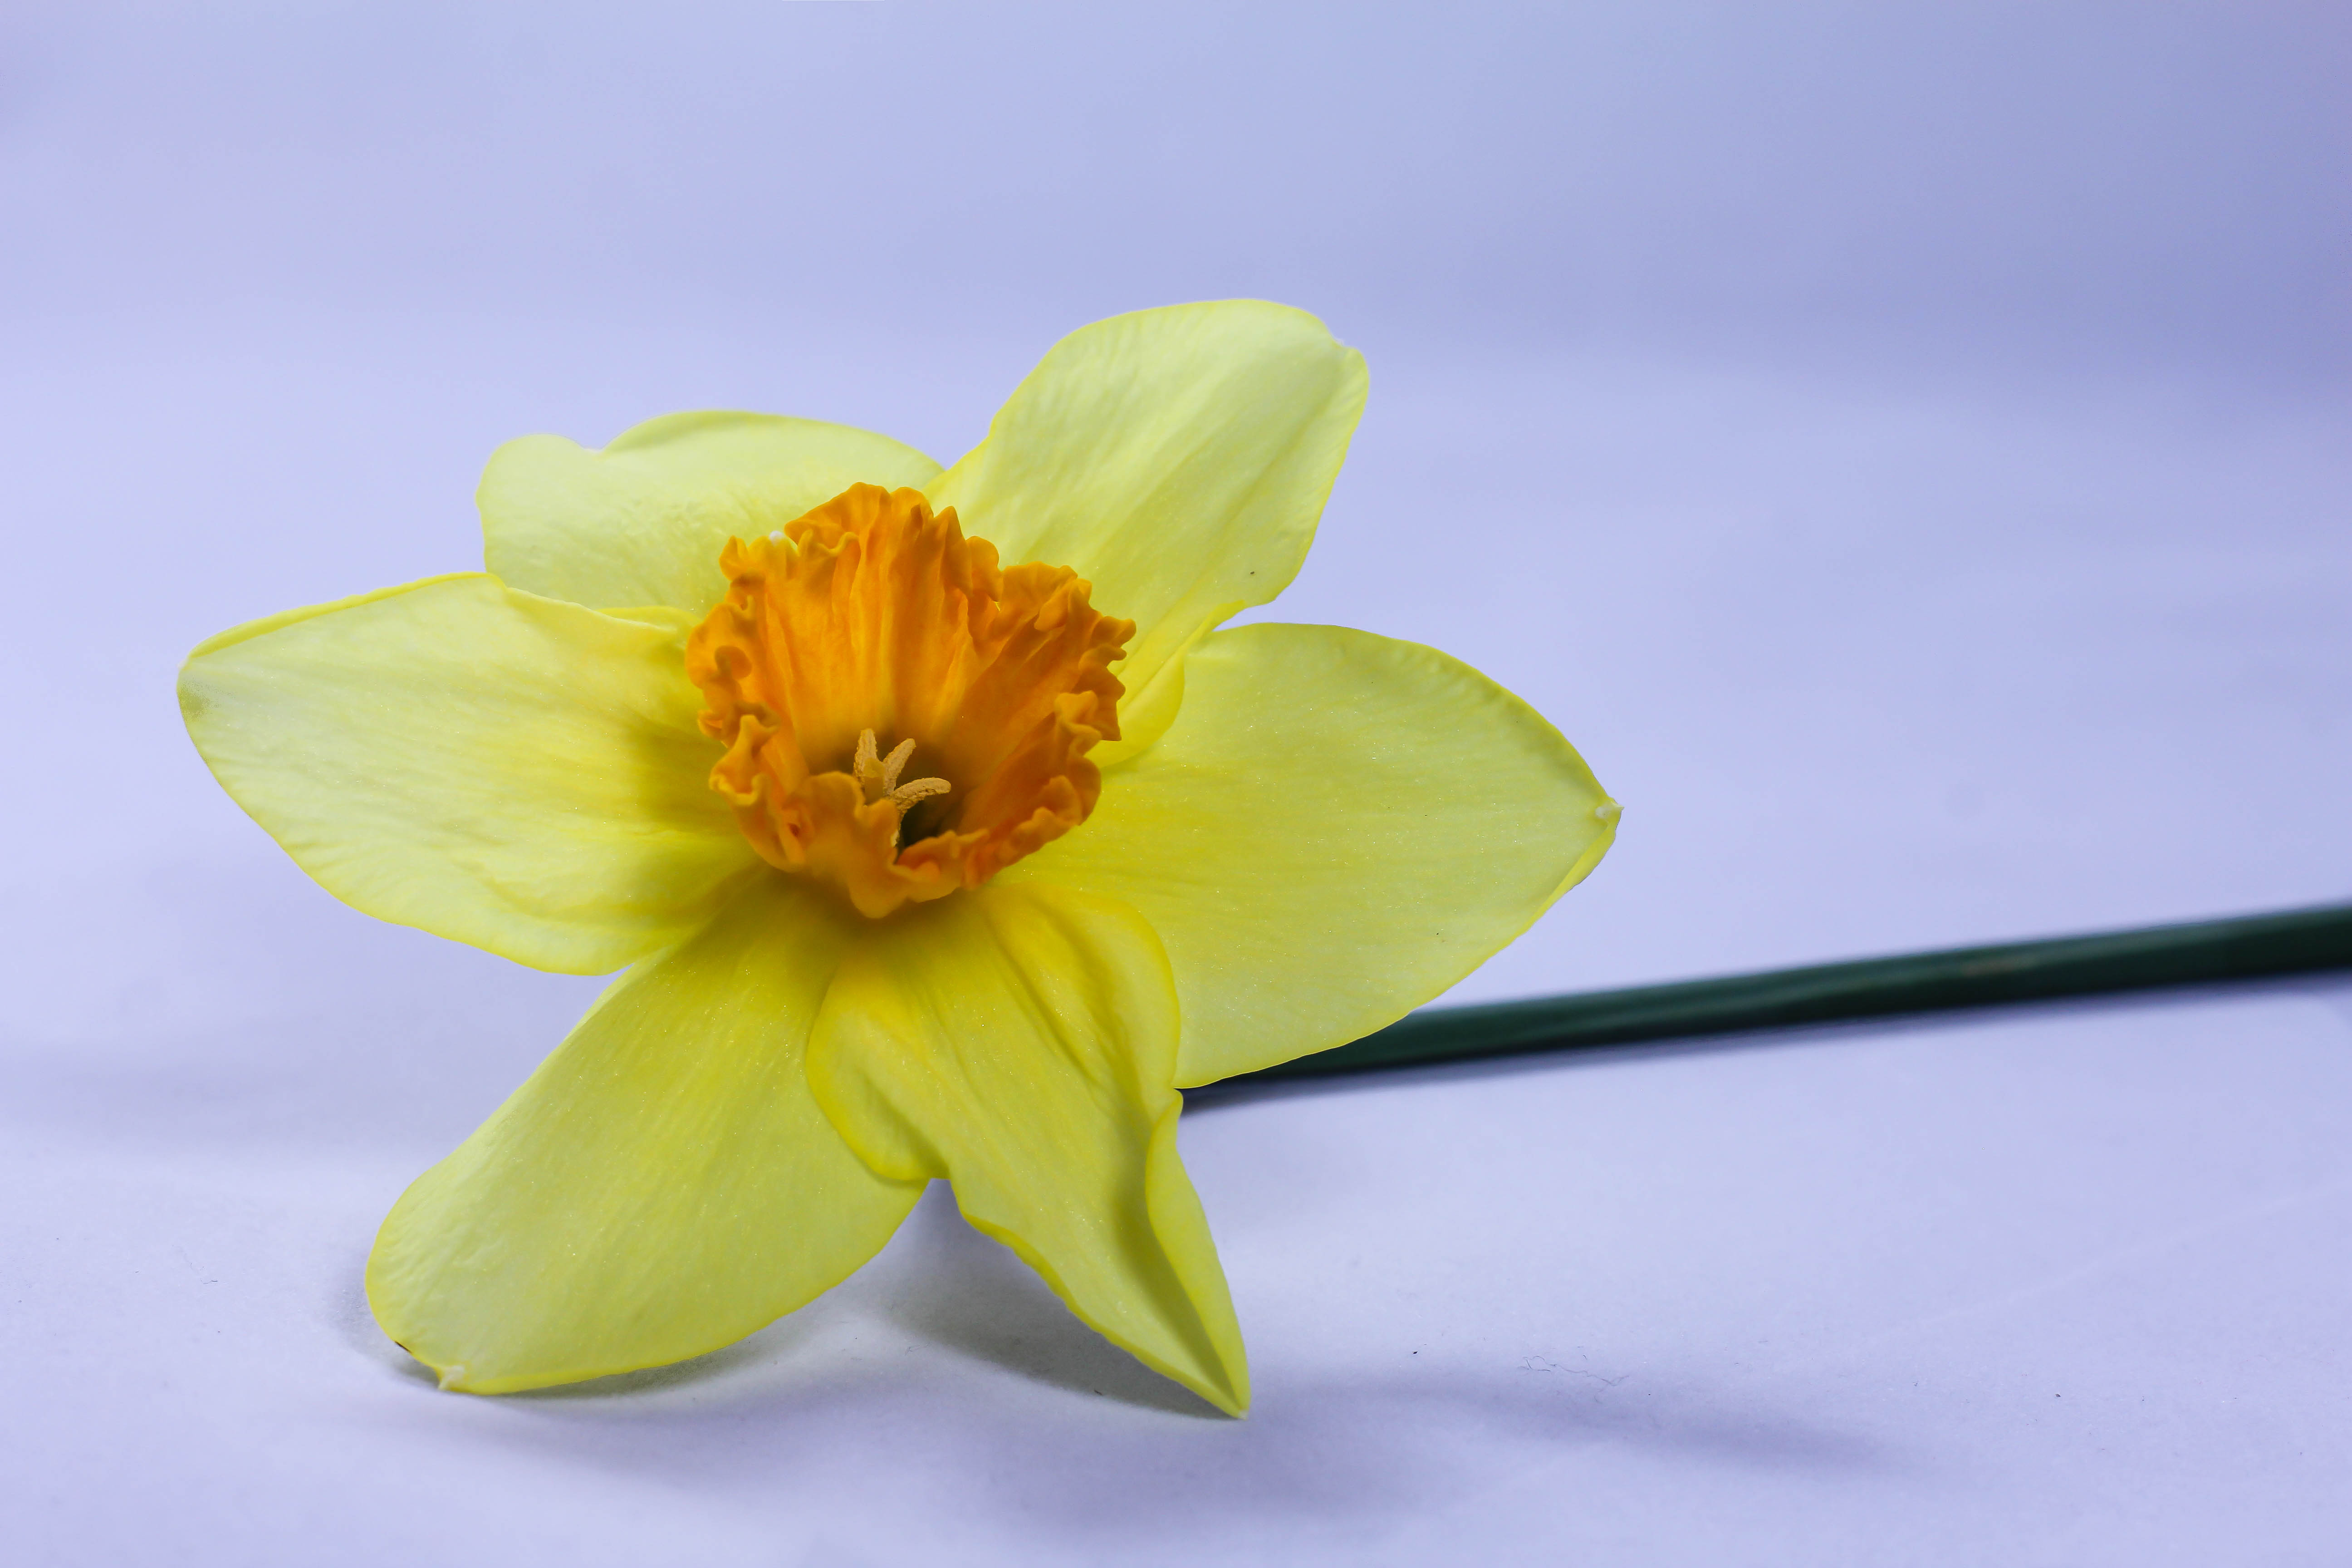

What’s wrong with these images? Besides the blue background and the shaded front of the flowers? If I can fix those two things, perhaps I’ll get something better.

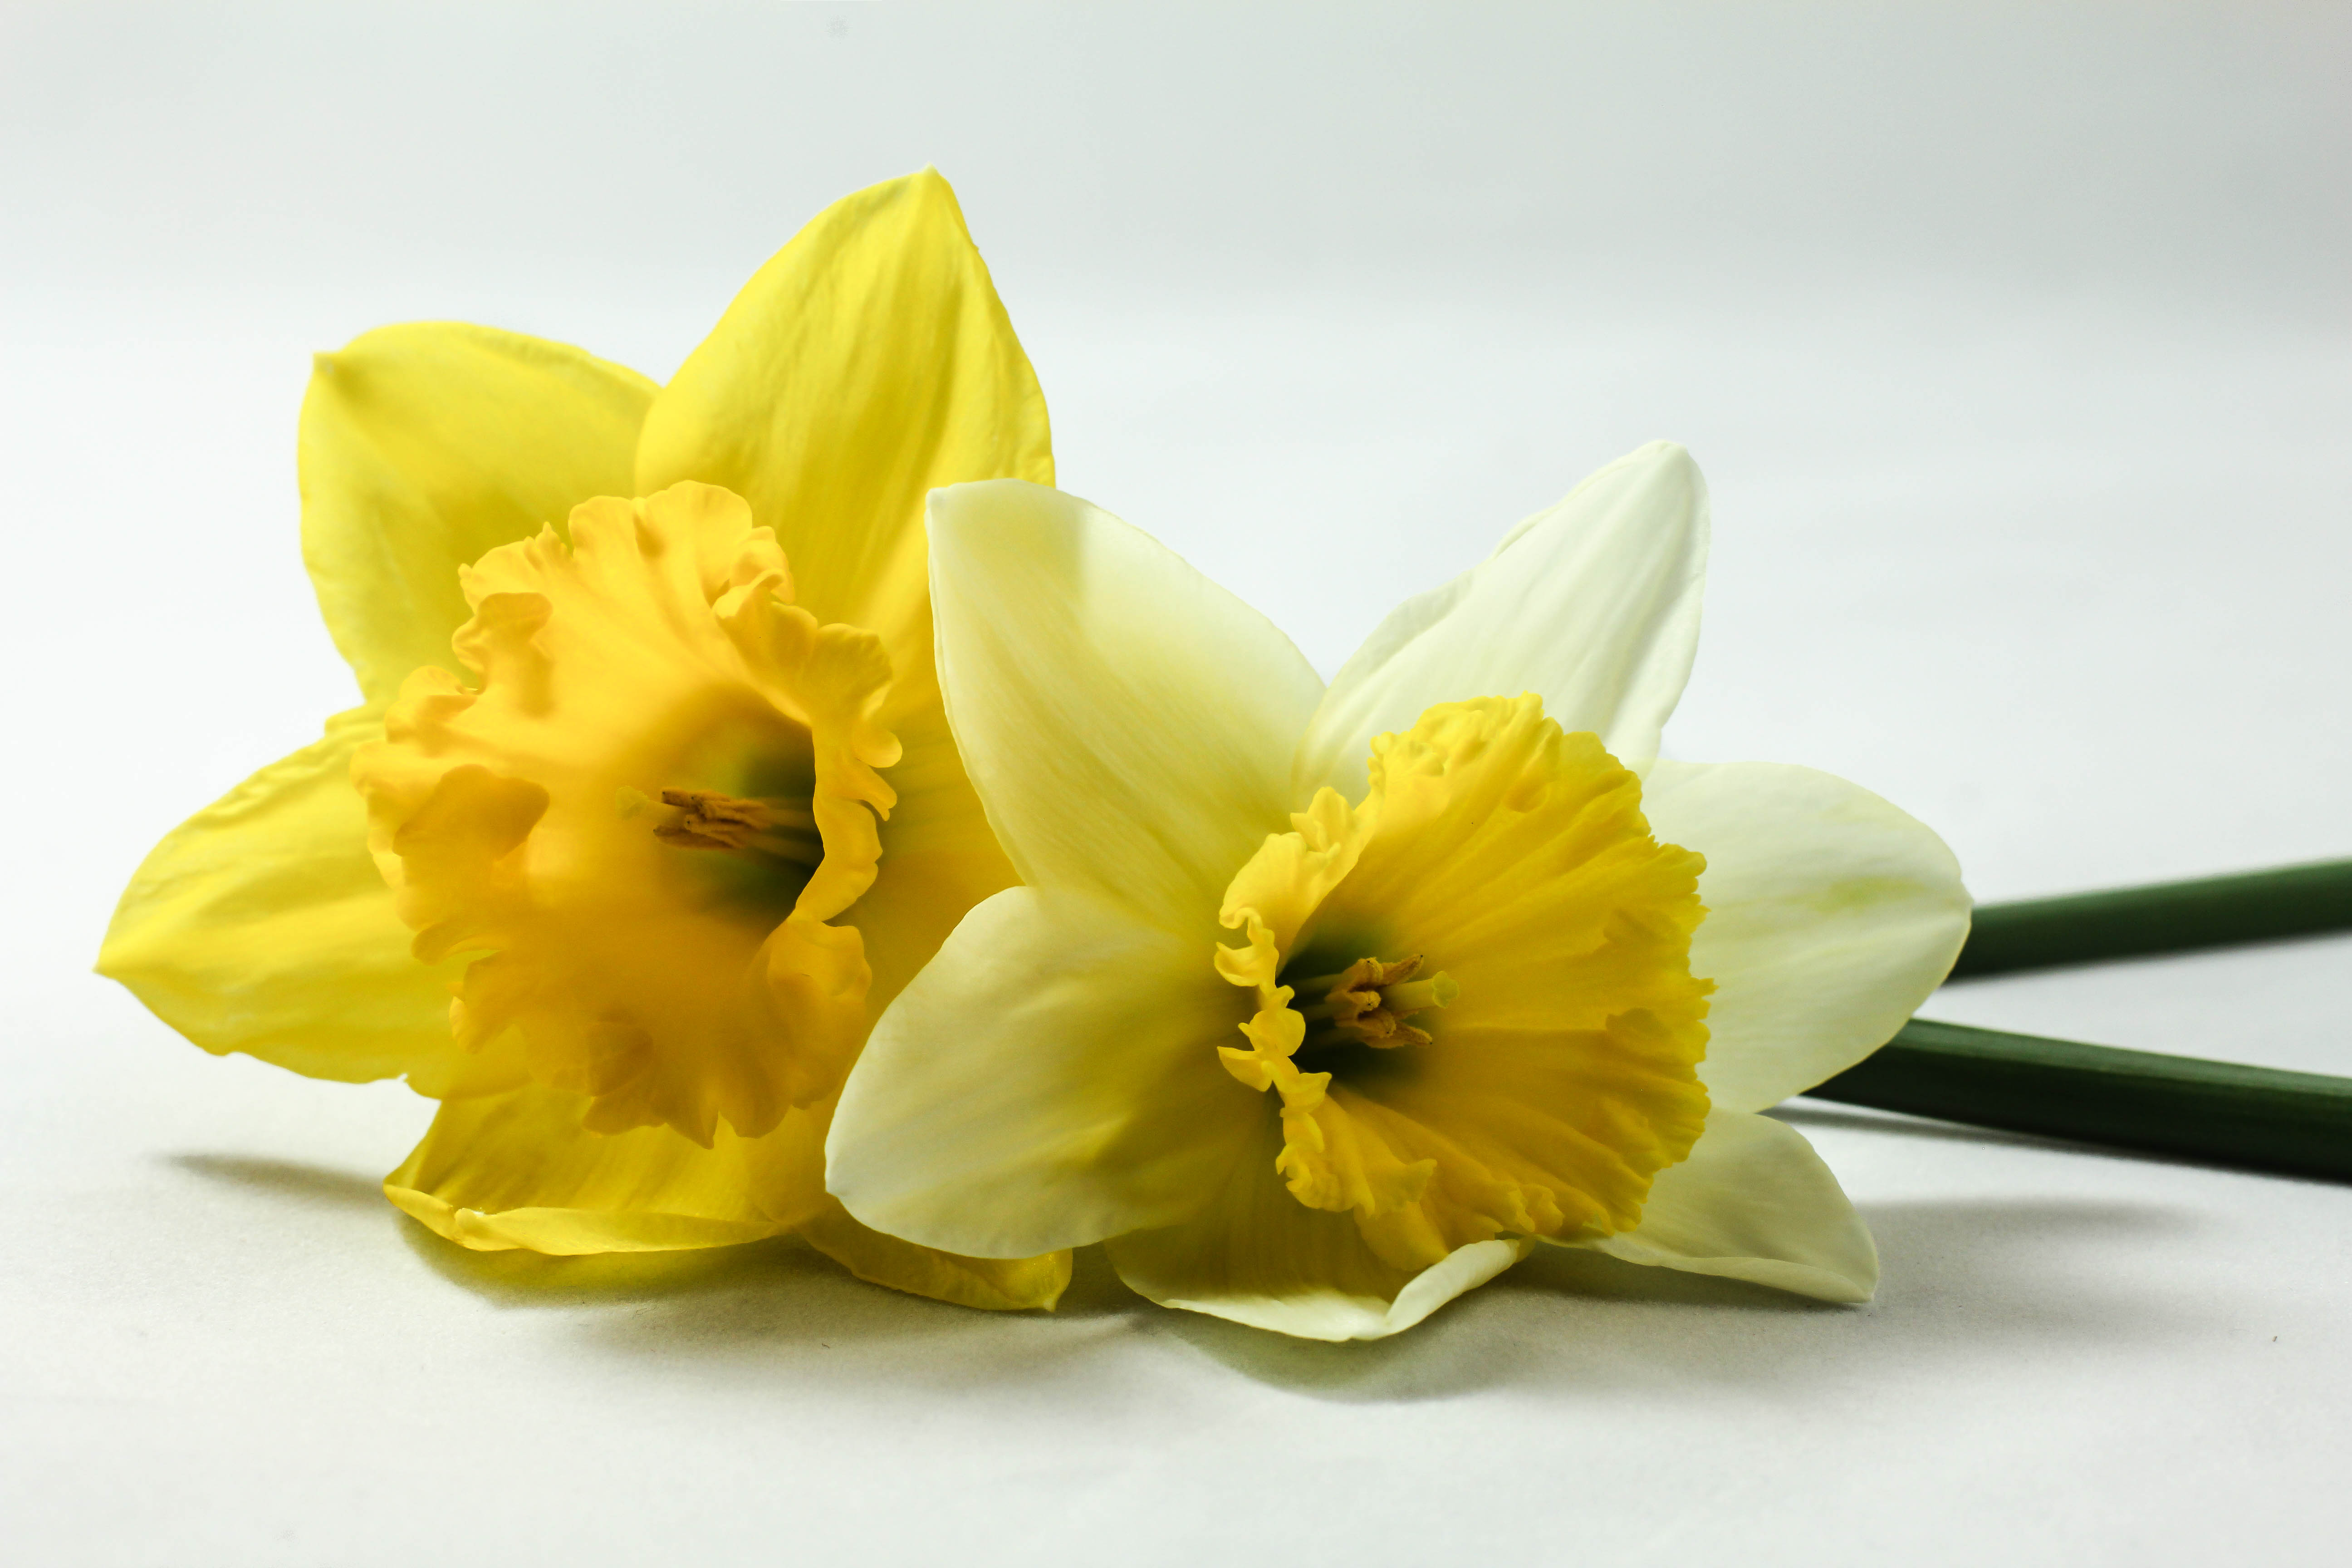
I managed to fix the blue by changing my white balance to Florescent, but it’s still not on the mark. The lighting in front is a bit better as I took one of the lamps and moved it around in the front until lighting was where I wanted it.
I then took the image above and in Lightroom 4, I dodged (lightened) the background to get rid of the muddiness.
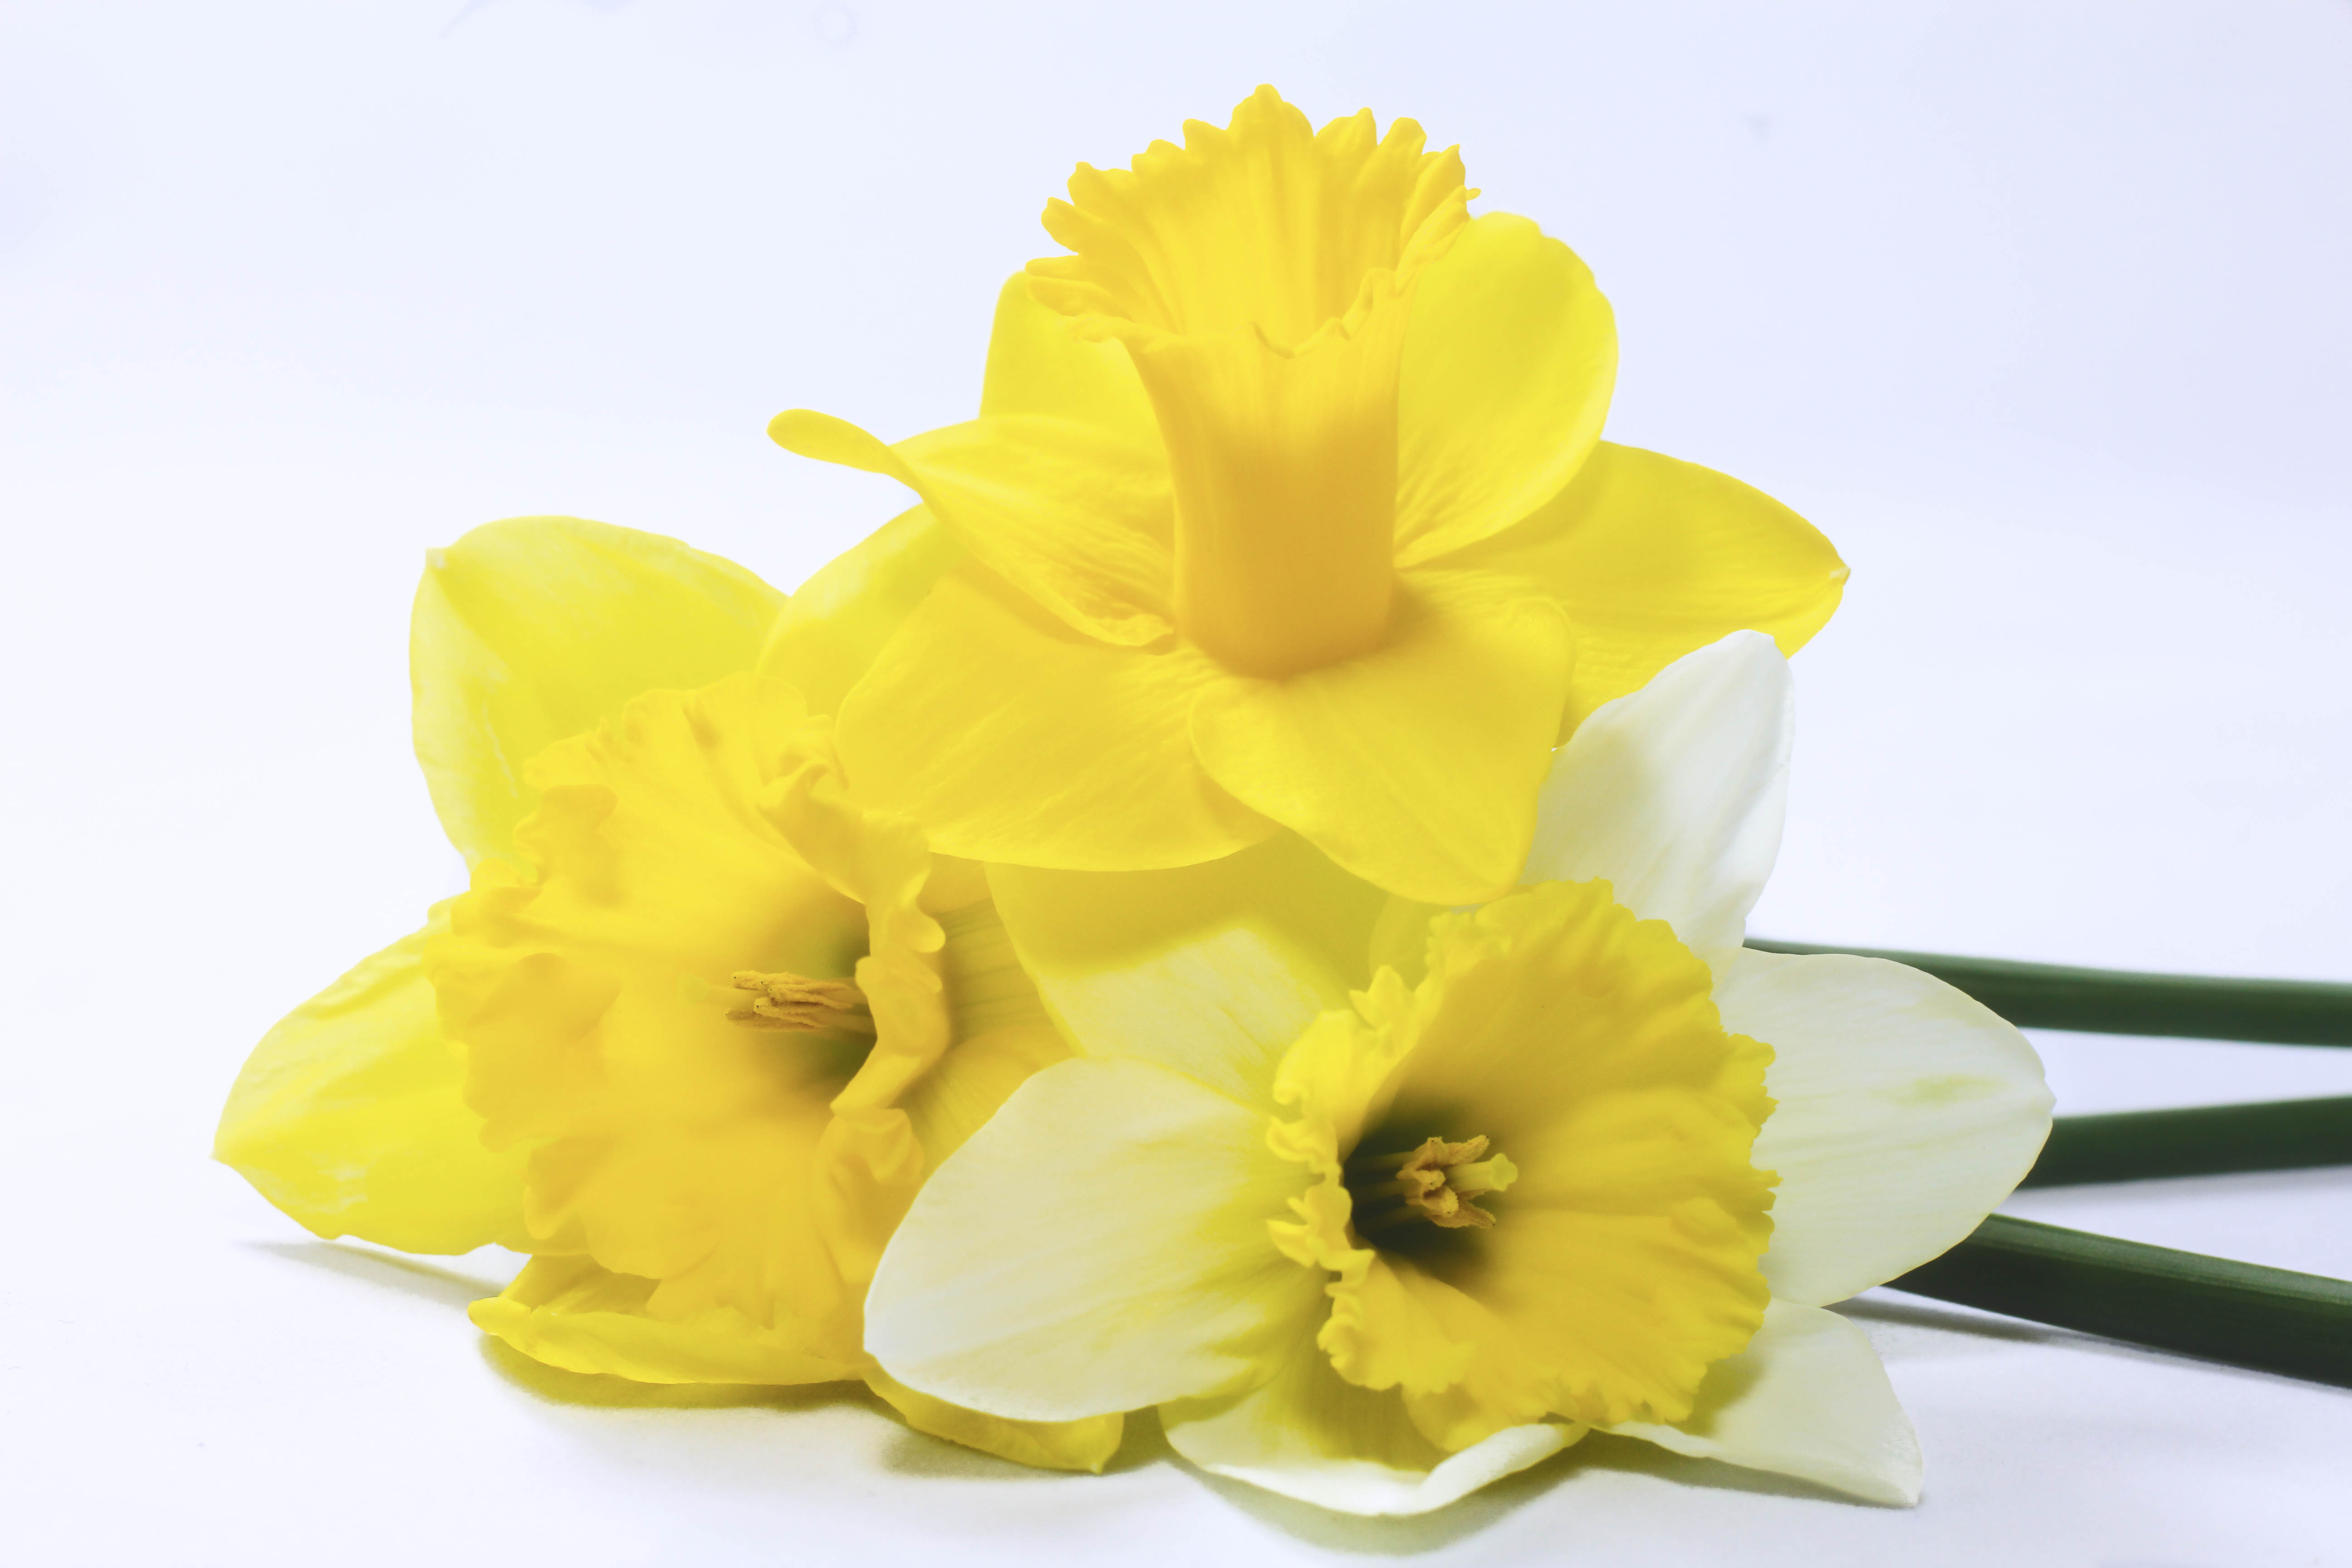
I’m getting there, but still not quite right. The idea is to blow out the background to get a crisp and clean white. Of course, working with yellow flowers doesn’t help either as the color throws off the color balance in a DSLR. So here is what I learned today with this exercise:
- First lesson learned: The teeny lamps with the Table Top Studio are worthless.
- Second lesson learned: I really need to set the white balance correctly on my camera
- Third lesson learned: Need a better background material. The fabric that came with the light box has a gray blue texture to it. I’m better off with white poster board.
- Fourth lesson learned. Four lamps are needed for each angle, front, sides and the back.
- Fifth lesson learned: Get a perfectly crisp and clean background.
Next time I’ll have a white poster board for the background and perhaps some plexiglass for some nice reflection. I’ll also make sure the white balance is correctly set in the camera. Wish me luck!
Categories: 2013 Project 365, Flowers, Nature


Love the way you showed the changes, beautiful 🙂
My pleasure Andy. I was hoping this post wouldn’t bore anyone.
Not at all! very much enjoyed it 🙂
May I suggest Kirk Tuck’s excellent book LED Lighting. If you are going to go down the lighting path LEDs are a joy to work with. They make lighting easy, can be battery powered for portability and are extremely reasonable. I am looking at strobes for certain types of work but my go to lighting is LEDs.
That totally surprises me. LED makes me think that they send off a blue color. Interesting, I’ll most certainly look into it. 🙂
I think you’re doing great and on the right track. The LED suggestion is an excellent one. I also use a white balance cap to set custom white balances. It helps a lot. I agree, yellow is really tricky to work with
I’ll play more with the white balance tomorrow. I do have an expo disc that I need to relearn, along with setting custom white balance on the camera. Thanks Ali for the support.
Looks like you are well on your way Emily.
Back in my old commercial studio days I think we used a light table made of a bendable opaque plexi and would light that from below as well as above.
Now that is a really cool idea. Brilliant Phil.
Good luck with the white poster board, I tried it, didn’t work for me. I found that a very light grey worked the best. Other than that, you’re making progress, please keep us informed.
I got the white poster board idea from this group called Breakfast stock club that teaches you how to capture stock images. Interesting about the grey. Of course, if I knew how to change backgrounds in Photoshop, my life would be much easier.
The poster board that I had was glossy, maybe that’s where I went wrong.
Humm..interesting. I’ll play this week and see what I come up with.
Good luck with the new project, Emily. Looking good. I am not an expert, almost only using natural light…
That is the same with me Bente. I prefer being outside with natural light. I think it’s good to know to help understand light better. Thank you.
So much to learn about lighting. I’ve just scratched the surface so far myself as it’s way more complicated than it appears. The results are pretty amazing once you get it right, though. Have fun and keep us posted on your progress!
It really is, and what I’m doing is so amateur. I do appreciate learning about the temperature of light and how to adjust the camera to that level. Now on to reflectors and such. 🙂
There is always so much to lear. You did start with a really engaging subject.
Isn’t that what life is about? To not stay stagnant, but rather to explore and learn as much as you can?
It’s amazing what lights can do. I wouldn’t even know it. I thought it’s all camera tricks. Good luck.
This is jusst the tip of the iceberg. Think about all those professional portrait photographers, or those that paint images with light. Now that is amazing.
Congratulations on your 1st 90 days of this challenge, it’s been fun being part of your journey. This is such an interesting post – the lesson on lighting and background material is really useful. If I was painted still life subjects this information would be extremely relevant. I like seeing the results of your workout, BTW the daffs are wonderful!
Thank you so much Mary ! I would think the background – type of canvas – you’re painting on would create different results. Also starting with a base coat to set the tone of the painting right? Interesting how you can find the similarities between photography and painting. Although many artists claim photography isn’t art. Pfffttt I say!
In my opinion, I’ve learned more about the art of creating w/photography than I ever thought possible since being introduced to yours and all the other fantastic photographers in wordpress blogging world. It’s pretty darn exciting and a wonderful world of ART!
Thank you so much Mary. I appreciate your thoughts on photography. There is so much creating within taking the photograph, then the post processing afterward. There are many photos that I don’t take or throw away because I “don’t feel it.” That is the artist aspect I think. Have a lovely day ! Got to run.
What an interesting lesson… And, WOW! Look at you go, lady!
Thank you so much ! But I’m such an amateur.
You did a fine job on these!
White poster board works great. Just be sure to get the matte finish, otherwise you can get some unwanted light reflected back at you (depending on how your lights are set up).
So nice to see daffodils!
Thanks for the tip Lisa. I remembered I had a poster board already and part 2 is what I used. It’s a bit dirty though. 🙂
I like them all, but I can see you’re a perfectionist!
When creating a stock photo, it has to be perfect. So thus the attempt. 🙂
Congrats on the 90 posts, and good luck with the studio shots!! I really like picture #2 here, it looks like a nice blue sky in the background 🙂
You’re awesome Calee! I appreciate your kind comment and it is amazing how fast time flies.
This year seems to be flying by so far! Good Luck with broaden your experience and knowledge of photography:)
I am trying Renee..one day I hope it’ll pay. 🙂