How slow can you go? That is with your shutter speed and how you can make something different than what it appears. There is a difference between Slow Exposures or Slow Shutter Speeds and Long Exposures and the beach is a fabulous place to try both techniques.
Someone asked me today if I plan out my images and as a matter a fact there are quite a few that I plan on capturing way before it happens. On my last trip to Florida nearly a year and half ago, I tracked down a Seashell store and spent some time and a good bit of pennies to create a wonderful collection of seashells for photographic art.
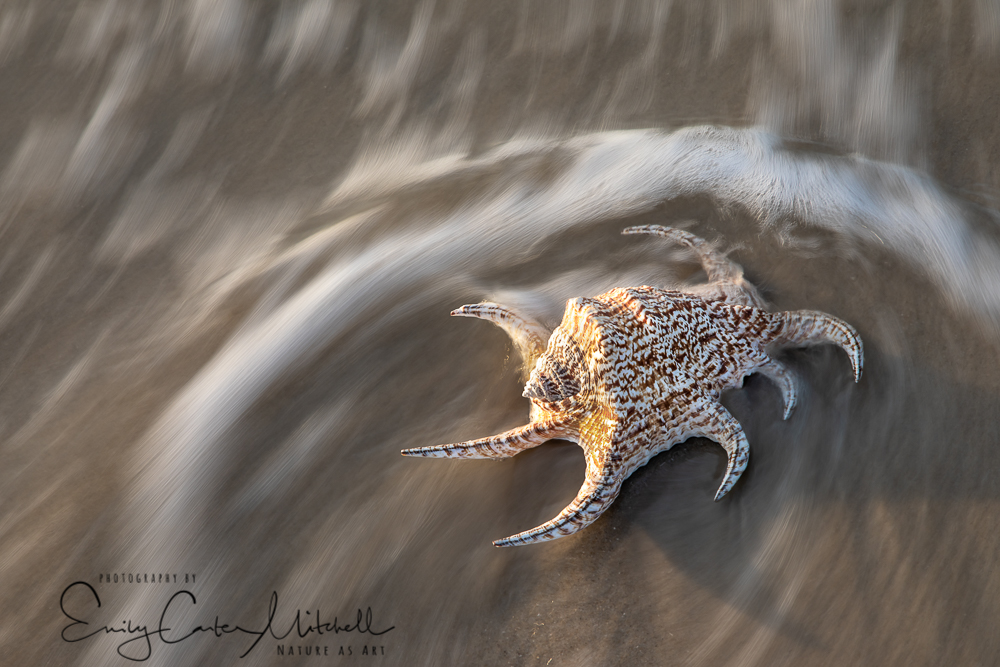
I’ve yet to begin working with them so when I was leaving the house at 4am I grabbed two out of the box (well, at least I knew where the box was) planning on capturing some Slow Exposures with them in the surf.
Many times I tend to be lazy, or rather allow my camera do some of the work for me and set my camera on Aperture Priority and set my f-stop to f/16 and ISO 100. It was early morning light and so I only needed a Circular Polarizing filter to help bring out the colors. The shutter speeds were around 1/6 or 1/8 of a second, blurring the water as it reached the seashells.
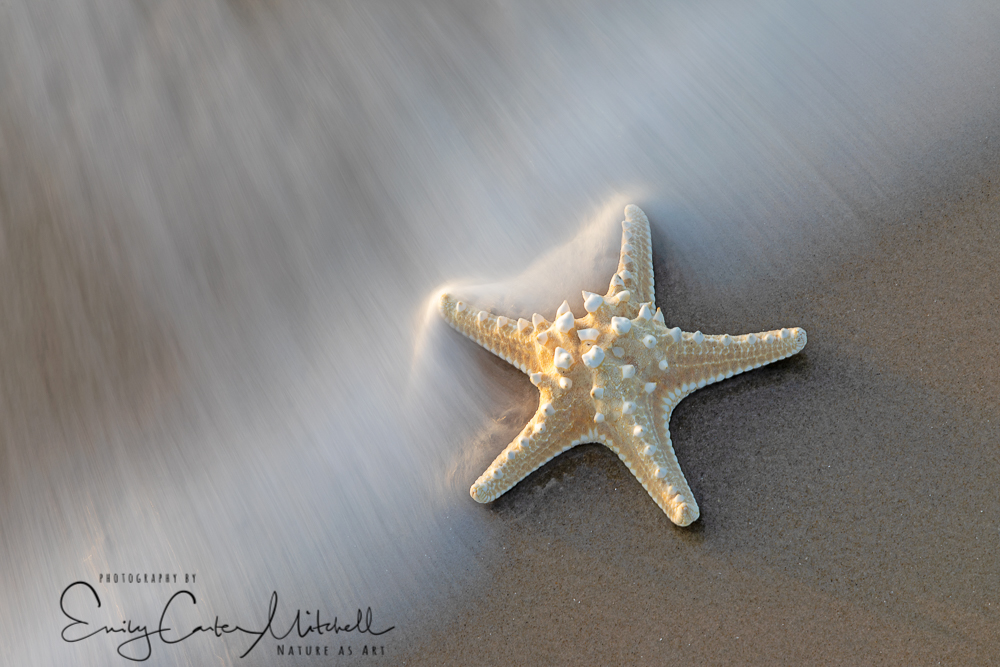
I was having a great time waiting for the surf to reach my feet, that is until it decided to grab my starfish and try to return it back to the sea. “Bring it back !” I demanded of the sea. I had just started to using the starfish and I paid for the darned thing. Luckily the tide was coming in and within short order it began to return it back to the sand. Close enough for me to be able to grab it and store it safely away from the surf.
The first image is of a Chiragra spider conch which is found along Asia’s coastlines, while the starfish is a White Thorny Starfish.
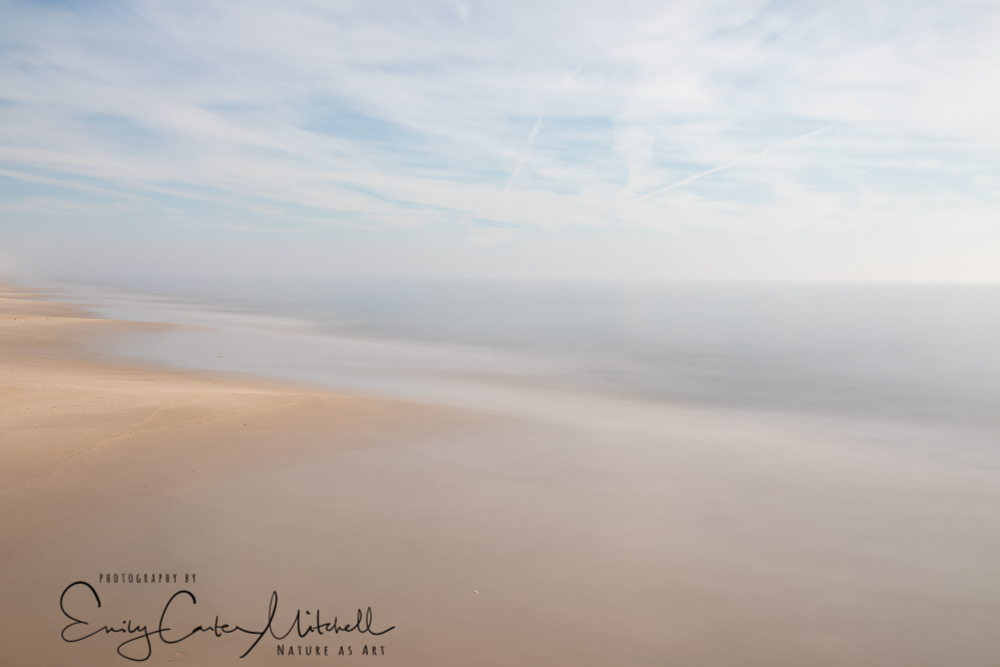
After playing with the seashells for a bit, I then added a Lee 10-stop “Big Stopper” to transition for a Long Exposure capture. Long Exposures can sometimes seem rather mysterious but there are great formulas and smart phone apps that can be used to take the mystery away. ND Timer which is available for iPhone and Androidallows you to calculate a long exposure setting when you use two filters and has a timer.
It’s generally simple. You take your first image and notate the shutter speed for the correct exposure. You then take the shutter speed and dial it in to the ND Timer app along with the filters you’re using and the new (long) shutter speed time will be given to you.
With a 10-stop and even with a 6-stop it can be quite hard, if not impossible to see through the lens or with the ‘live view’ so you compose the image first acquire focus then set the lens on manual focus and very carefully install the filter as to not move the lens.
So here’s where it gets a little tricky. If you want to go with an exposure time longer than the formula it becomes guess work. For this image I went with a 90 second exposure at f/22, ISO 100.
My preferred filter mount system is the NiSi V5- Pro 100mm Filter Holder system. I have added a couple of Singh-Ray Graduated Neutral Density Filters and two Lee 6-stop and 10-stop filters to the kit. This holder system allows you to easily clamp on the holder onto a lens-attached Circular Polarizer filter.
Exposures over 30 seconds require you to use the ‘Bulb’ mode and I love how my Canon 5D Mark IV has a touch screen that engages the shutter and has a stop watch on the display. Touch the screen again to stop the capture.
Needless to say a tripod is mandatory for these techniques. The sky is the limit for creativity and the more you learn the capabilities of your camera the more fun you’ll have.
Categories: All about Hoofbeats & Footprints


I’ve saved this article to try out at a later date. Thanks for your tips. 🙂
Thank you Flores ! I can’t wait to see your results.
Love the photos. I’ll have to try this myself. Thanks.
Truly I thought for certain you had this one well accomplished Brigham Stephen. Thank you and certainly share when you post.
Simply superb
You are too kind Mark. Thank you and have a great day!